Sponsored
Sponsored
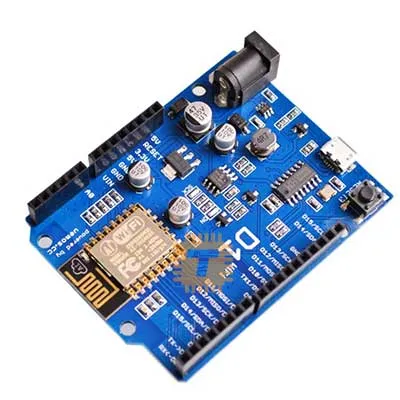
ESP8266 ATmega328P UNO Dev Board R3 32Mb WiFi Bluetooth Price in Sri Lanka
At 1 shopRs1,980Out of stock at every shop
Compare prices
1 shop · in stock first, cheapest first
Sponsored
Search for it on
Price history
Each shop's price at the end of each day, over the last 14 days.
Tronic.lk · IoT
In stockOut of stock
Tap or hover over the chart to see every shop's price that day.
Sponsored
Sponsored
Description
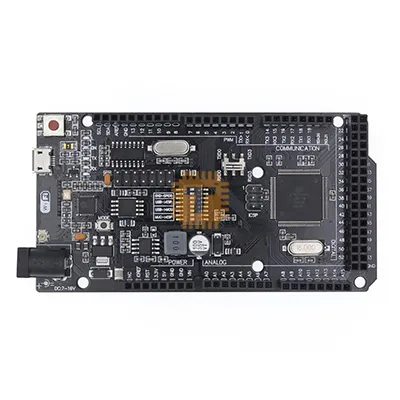
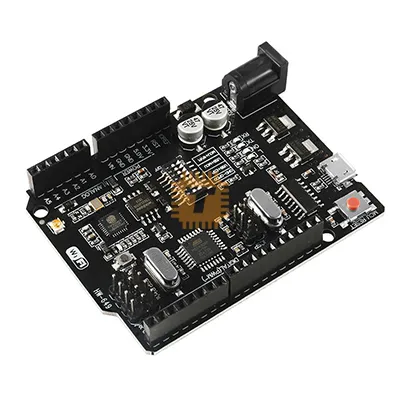
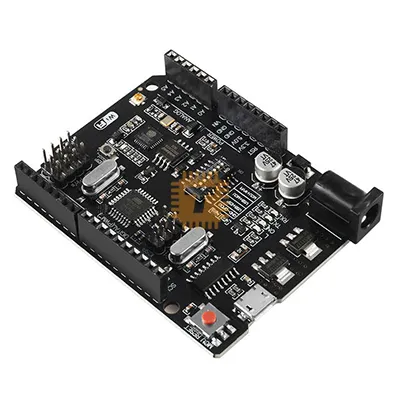
The UNO + WiFi R3 is a specialized, integrated development board that combines the familiar architecture of the Arduino UNO (ATmega328P) with the wireless power of the ESP8266. This board eliminates the need for external ESP-01 modules or logic level shifters, providing a compact 32Mb (4MB) flash memory environment for IoT applications. All modules can function together or as independent units via onboard switching.
Specifications
- Microcontroller (MCU): Atmel ATmega328P.
- WiFi MCU: ESP8266 with 32Mb (4MB) Flash.
- USB-to-Serial Converter: CH340G.
- Input Voltage: 6V–9V DC recommended.
- Form Factor: Fully compatible with Uno R3 pinouts and shields.
- Communication: Micro-USB port for programming both chips.
DIP Switch Configuration
The board uses an 8-position DIP switch to route the serial signals between the USB port, the ATmega328P, and the ESP8266.
| Mode Description | 1 | 2 | 3 | 4 | 5 | 6 | 7 | 8 |
| Upload Sketch to ESP8266 | OFF | OFF | OFF | OFF | ON | ON | ON | OFF |
| Connect USB to ESP8266 | OFF | OFF | OFF | OFF | ON | ON | OFF | OFF |
| Upload Sketch to ATmega328P | OFF | OFF | ON | ON | OFF | OFF | OFF | OFF |
| ATmega328P + ESP8266 Linked | ON | ON | OFF | OFF | OFF | OFF | OFF | OFF |
| All Modules Independent | OFF | OFF | OFF | OFF | OFF | OFF | OFF | OFF |
Features
- Integrated IoT Solution: Combines the robust GPIO handling of the ATmega328P with high-speed WiFi, allowing the Uno to act as a web client or server.
- Standard Uno Pinout: Allows the use of existing Uno shields and peripheral hardware without modification.
- Onboard Voltage Regulation: Converts input voltage safely for both the 5V ATmega and the 3.3V ESP8266 components.
- CH340G Interface: A reliable USB-TTL converter that handles communication and programming for both onboard microcontrollers.
Programming Guide
- Driver: Ensure the CH340G drivers are installed on your PC.
- Arduino IDE: Select "Arduino Uno" when programming the ATmega328P and "Generic ESP8266 Module" for the WiFi chip.
- The Reset Trick: When uploading a sketch to the ATmega328P, press and hold the Reset button while the code is compiling. Release the button immediately when the IDE status changes to "Uploading".
- ESP8266 Programming: Ensure DIP switches 5, 6, and 7 are ON to put the ESP8266 into flash mode.
Common Applications
- Wireless Data Loggers: Reading analog sensors with the ATmega328P and sending the data to the cloud via the ESP8266.
- Home Automation Gateways: Using the ESP8266 to receive web commands and the Uno to toggle relays or motors.
- WiFi-Enabled Shields: Upgrading existing Uno-based projects with internet connectivity in a single-board footprint.
Usage Tips
- Power Input: While the board can run on USB, using a 9V power adapter is recommended when using WiFi heavily to prevent brownouts.
- Logic Level: The ATmega328P on this board operates at 5V, while the ESP8266 operates at 3.3V. The internal traces are already level-shifted, so they can communicate safely when linked via the DIP switches.
- DIP Switch 8: This switch is generally unused in standard operations and should typically remain OFF.
Questions
About ESP8266 ATmega328P UNO Dev Board R3 32Mb WiFi Bluetooth in Sri LankaWhat is the price of ESP8266 ATmega328P UNO Dev Board R3 32Mb WiFi Bluetooth in Sri Lanka?
The price of ESP8266 ATmega328P UNO Dev Board R3 32Mb WiFi Bluetooth in Sri Lanka is Rs 1,980 at 1 shop.
Where can I compare ESP8266 ATmega328P UNO Dev Board R3 32Mb WiFi Bluetooth prices in Sri Lanka?
37left.lk lists ESP8266 ATmega328P UNO Dev Board R3 32Mb WiFi Bluetooth prices from 1 shop in Sri Lanka on one page.
Is ESP8266 ATmega328P UNO Dev Board R3 32Mb WiFi Bluetooth available in Sri Lanka?
ESP8266 ATmega328P UNO Dev Board R3 32Mb WiFi Bluetooth is out of stock at every shop in Sri Lanka.